Interactive visualization#
Note
This tutorial uses the legacy OpenGL Visualizer API. For new applications,
prefer the Filament-based visualization stack, which provides physically based
rendering, remote visualization, GUI controls, and 3D Gaussian splatting. See
Visualization and
3D Gaussian Splatting in Open3D.
This tutorial introduces user interaction features of the visualizer window provided by:-
open3d.visualization.draw_geometries_with_editingopen3d.visualization.VisualizerWithEditing
 8# examples/python/visualization/interactive_visualization.py
 9
10import numpy as np
11import copy
12import open3d as o3d
13
14
15def demo_crop_geometry():
16    print("Demo for manual geometry cropping")
17    print(
18        "1) Press 'Y' twice to align geometry with negative direction of y-axis"
19    )
20    print("2) Press 'K' to lock screen and to switch to selection mode")
21    print("3) Drag for rectangle selection,")
22    print("   or use ctrl + left click for polygon selection")
23    print("4) Press 'C' to get a selected geometry")
24    print("5) Press 'S' to save the selected geometry")
25    print("6) Press 'F' to switch to freeview mode")
26    pcd_data = o3d.data.DemoICPPointClouds()
27    pcd = o3d.io.read_point_cloud(pcd_data.paths[0])
28    o3d.visualization.draw_geometries_with_editing([pcd])
29
30
31def draw_registration_result(source, target, transformation):
32    source_temp = copy.deepcopy(source)
33    target_temp = copy.deepcopy(target)
34    source_temp.paint_uniform_color([1, 0.706, 0])
35    target_temp.paint_uniform_color([0, 0.651, 0.929])
36    source_temp.transform(transformation)
37    o3d.visualization.draw_geometries([source_temp, target_temp])
38
39
40def prepare_data():
41    pcd_data = o3d.data.DemoICPPointClouds()
42    source = o3d.io.read_point_cloud(pcd_data.paths[0])
43    target = o3d.io.read_point_cloud(pcd_data.paths[2])
44    print("Visualization of two point clouds before manual alignment")
45    draw_registration_result(source, target, np.identity(4))
46    return source, target
47
48
49def pick_points(pcd):
50    print("")
51    print(
52        "1) Please pick at least three correspondences using [shift + left click]"
53    )
54    print("   Press [shift + right click] to undo point picking")
55    print("2) After picking points, press 'Q' to close the window")
56    vis = o3d.visualization.VisualizerWithEditing()
57    vis.create_window()
58    vis.add_geometry(pcd)
59    vis.run()  # user picks points
60    vis.destroy_window()
61    print("")
62    return vis.get_picked_points()
63
64
65def register_via_correspondences(source, target, source_points, target_points):
66    corr = np.zeros((len(source_points), 2))
67    corr[:, 0] = source_points
68    corr[:, 1] = target_points
69    # estimate rough transformation using correspondences
70    print("Compute a rough transform using the correspondences given by user")
71    p2p = o3d.pipelines.registration.TransformationEstimationPointToPoint()
72    trans_init = p2p.compute_transformation(source, target,
73                                            o3d.utility.Vector2iVector(corr))
74    # point-to-point ICP for refinement
75    print("Perform point-to-point ICP refinement")
76    threshold = 0.03  # 3cm distance threshold
77    reg_p2p = o3d.pipelines.registration.registration_icp(
78        source, target, threshold, trans_init,
79        o3d.pipelines.registration.TransformationEstimationPointToPoint())
80    draw_registration_result(source, target, reg_p2p.transformation)
81
82
83def demo_manual_registration():
84    print("Demo for manual ICP")
85    source, target = prepare_data()
86
87    # pick points from two point clouds and builds correspondences
88    source_points = pick_points(source)
89    target_points = pick_points(target)
90    assert (len(source_points) >= 3 and len(target_points) >= 3)
91    assert (len(source_points) == len(target_points))
92    register_via_correspondences(source, target, source_points, target_points)
93    print("")
94
95
96if __name__ == "__main__":
97    demo_crop_geometry()
98    demo_manual_registration()
This script executes two applications of user interaction: demo_crop_geometry and demo_manual_registration.
Crop geometry#
15def demo_crop_geometry():
16    print("Demo for manual geometry cropping")
17    print(
18        "1) Press 'Y' twice to align geometry with negative direction of y-axis"
19    )
20    print("2) Press 'K' to lock screen and to switch to selection mode")
21    print("3) Drag for rectangle selection,")
22    print("   or use ctrl + left click for polygon selection")
23    print("4) Press 'C' to get a selected geometry")
24    print("5) Press 'S' to save the selected geometry")
25    print("6) Press 'F' to switch to freeview mode")
26    pcd_data = o3d.data.DemoICPPointClouds()
27    pcd = o3d.io.read_point_cloud(pcd_data.paths[0])
28    o3d.visualization.draw_geometries_with_editing([pcd])
This function simply reads a point cloud and calls draw_geometries_with_editing. This function provides vertex selection and cropping.
Note
Open3D has a VisualizerWithEditing class that inherits Visualizer class. It adds graphic user interaction features. Likewise examples in Customized visualization, VisualizerWithEditing() can be explicitly used instead of draw_geometries_with_editing([pcd]).
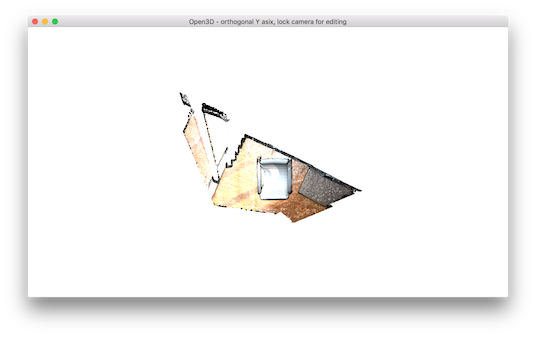
Once a geometry is displayed, press Y twice to align geometry with negative direction of y-axis. After adjusting viewing orientation, press K to lock screen and to switch to the selection mode.
Tip
The practical step for selecting area is to align the geometry with arbitrary axis using orthographic projection model. This trick makes selection easier, because it avoids self-occlusion hassle due to perspective projection.
To select a region, use either mouse drag (rectangle selection) or ctrl + left mouse click (polygon selection). The below example shows a selected area using a polygon.

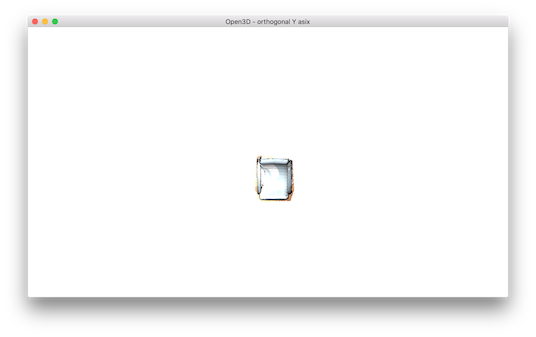
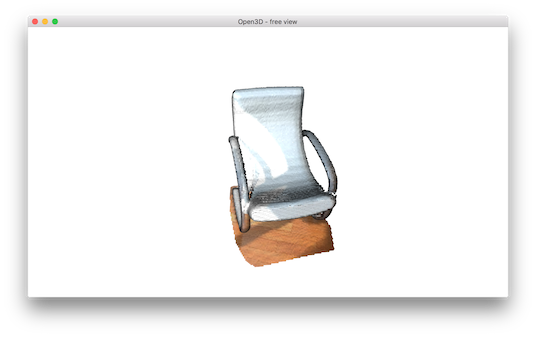
Note that the selected area is dark shaded. To keep the selected area and discard the rest, press C. A dialog box appears, which can be used to save the cropped geometry. The cropping result is shown after saving.

To finish selection mode, press F to switch to freeview mode.
Manual registration#
The following script registers two point clouds using point-to-point ICP. It gets initial alignment via user interaction.
Prepare data#
40def prepare_data():
41    pcd_data = o3d.data.DemoICPPointClouds()
42    source = o3d.io.read_point_cloud(pcd_data.paths[0])
43    target = o3d.io.read_point_cloud(pcd_data.paths[2])
44    print("Visualization of two point clouds before manual alignment")
45    draw_registration_result(source, target, np.identity(4))
46    return source, target
This function reads two point clouds, and visualizes the point clouds before performing manual alignment.

Select correspondences#
49def pick_points(pcd):
50    print("")
51    print(
52        "1) Please pick at least three correspondences using [shift + left click]"
53    )
54    print("   Press [shift + right click] to undo point picking")
55    print("2) After picking points, press 'Q' to close the window")
56    vis = o3d.visualization.VisualizerWithEditing()
57    vis.create_window()
58    vis.add_geometry(pcd)
59    vis.run()  # user picks points
60    vis.destroy_window()
61    print("")
62    return vis.get_picked_points()
The function pick_points(pcd) makes an instance of VisualizerWithEditing. To mimic draw_geometries, it creates windows, adds the geometry, visualizes the geometry, and then terminates. A novel interface function from VisualizerWithEditing is get_picked_points() that returns the indices of user-picked vertices.
To pick a vertex, press shift + left click on a window. If a vertex is selected, the visualizer window overlays a sphere on a selected vertex. For example, after picking three vertices in the source point cloud, it shows:

This will print:
Picked point #58481 (2.14, 1.56, 1.53) to add in queue.
Picked point #77321 (2.86, 1.92, 1.09) to add in queue.
Picked point #42639 (3.28, 1.53, 1.45) to add in queue.
Press Q to close the window. The next step is to pick the same correspondences in the target point cloud. The color of the sphere helps to identify the same correspondence.

This will print:
Picked point #54028 (1.62, 1.81, 1.23) to add in queue.
Picked point #97115 (2.45, 2.19, 1.11) to add in queue.
Picked point #47467 (2.75, 1.71, 1.45) to add in queue.
Tip
To get a good registration result, try to pick more than three points that are well-distributed in the scene. Using a vertex in the corner region is a good way to easily pick the right correspondence.
Registration using user correspondences#
65def register_via_correspondences(source, target, source_points, target_points):
66    corr = np.zeros((len(source_points), 2))
67    corr[:, 0] = source_points
68    corr[:, 1] = target_points
69    # estimate rough transformation using correspondences
70    print("Compute a rough transform using the correspondences given by user")
71    p2p = o3d.pipelines.registration.TransformationEstimationPointToPoint()
72    trans_init = p2p.compute_transformation(source, target,
73                                            o3d.utility.Vector2iVector(corr))
74    # point-to-point ICP for refinement
75    print("Perform point-to-point ICP refinement")
76    threshold = 0.03  # 3cm distance threshold
77    reg_p2p = o3d.pipelines.registration.registration_icp(
78        source, target, threshold, trans_init,
79        o3d.pipelines.registration.TransformationEstimationPointToPoint())
80    draw_registration_result(source, target, reg_p2p.transformation)
The later part of the demo computes an initial transformation based on the user-provided correspondences. This script builds pairs of correspondences using Vector2iVector(corr). It utilizes TransformationEstimationPointToPoint.compute_transformation to compute the initial transformation from the correspondences. The initial transformation is refined using registration_icp.
The registration result is as follows:
